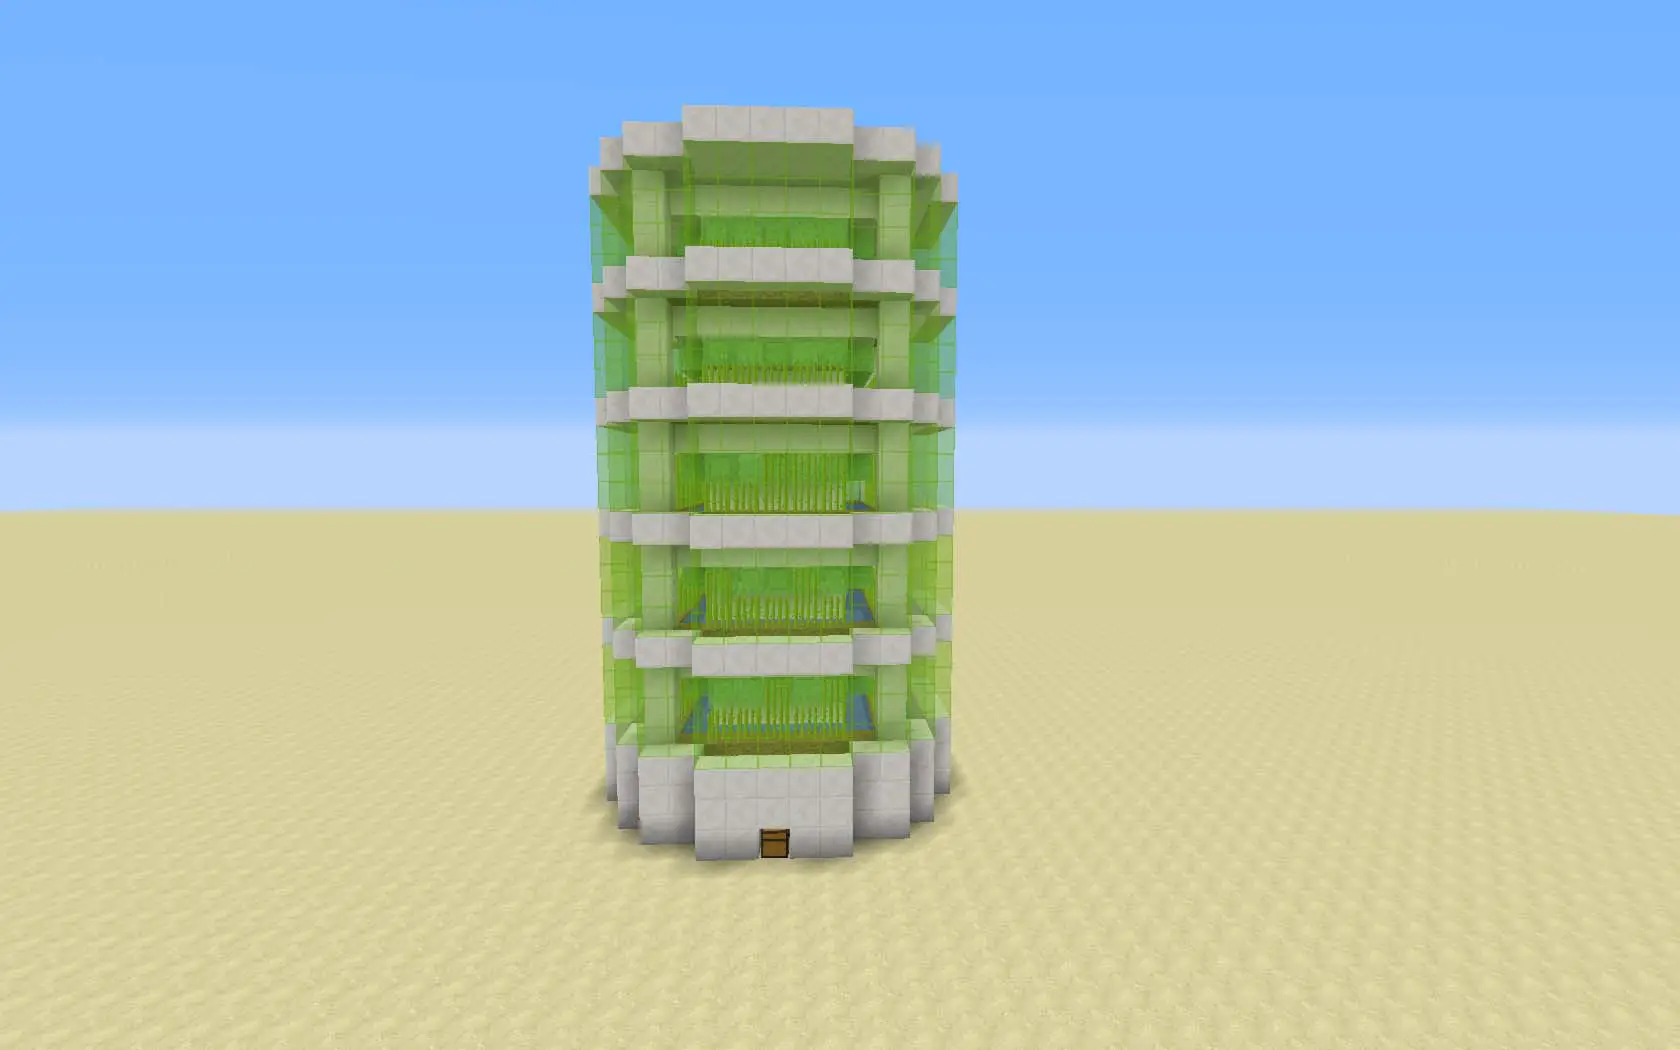
Here is a tutorial showing you how to create your own automatic sugar cane farm in Minecraft. This Minecraft automatic sugar cane farm tutorial shows you the best way of creating a sugar cane farm quickly and with the ability to stack high maximising your sugar cane output. Having sugar cane in Minecraft can be incredibly useful for building libraries, bookshelves, books, and more. Which is why you need an automatic sugar cane farm. Here’s our tutorial on how you can make your own Minecraft automatic sugar cane farm.
Minecraft Automatic Sugar Cane Farm Tutorial
Layer 1
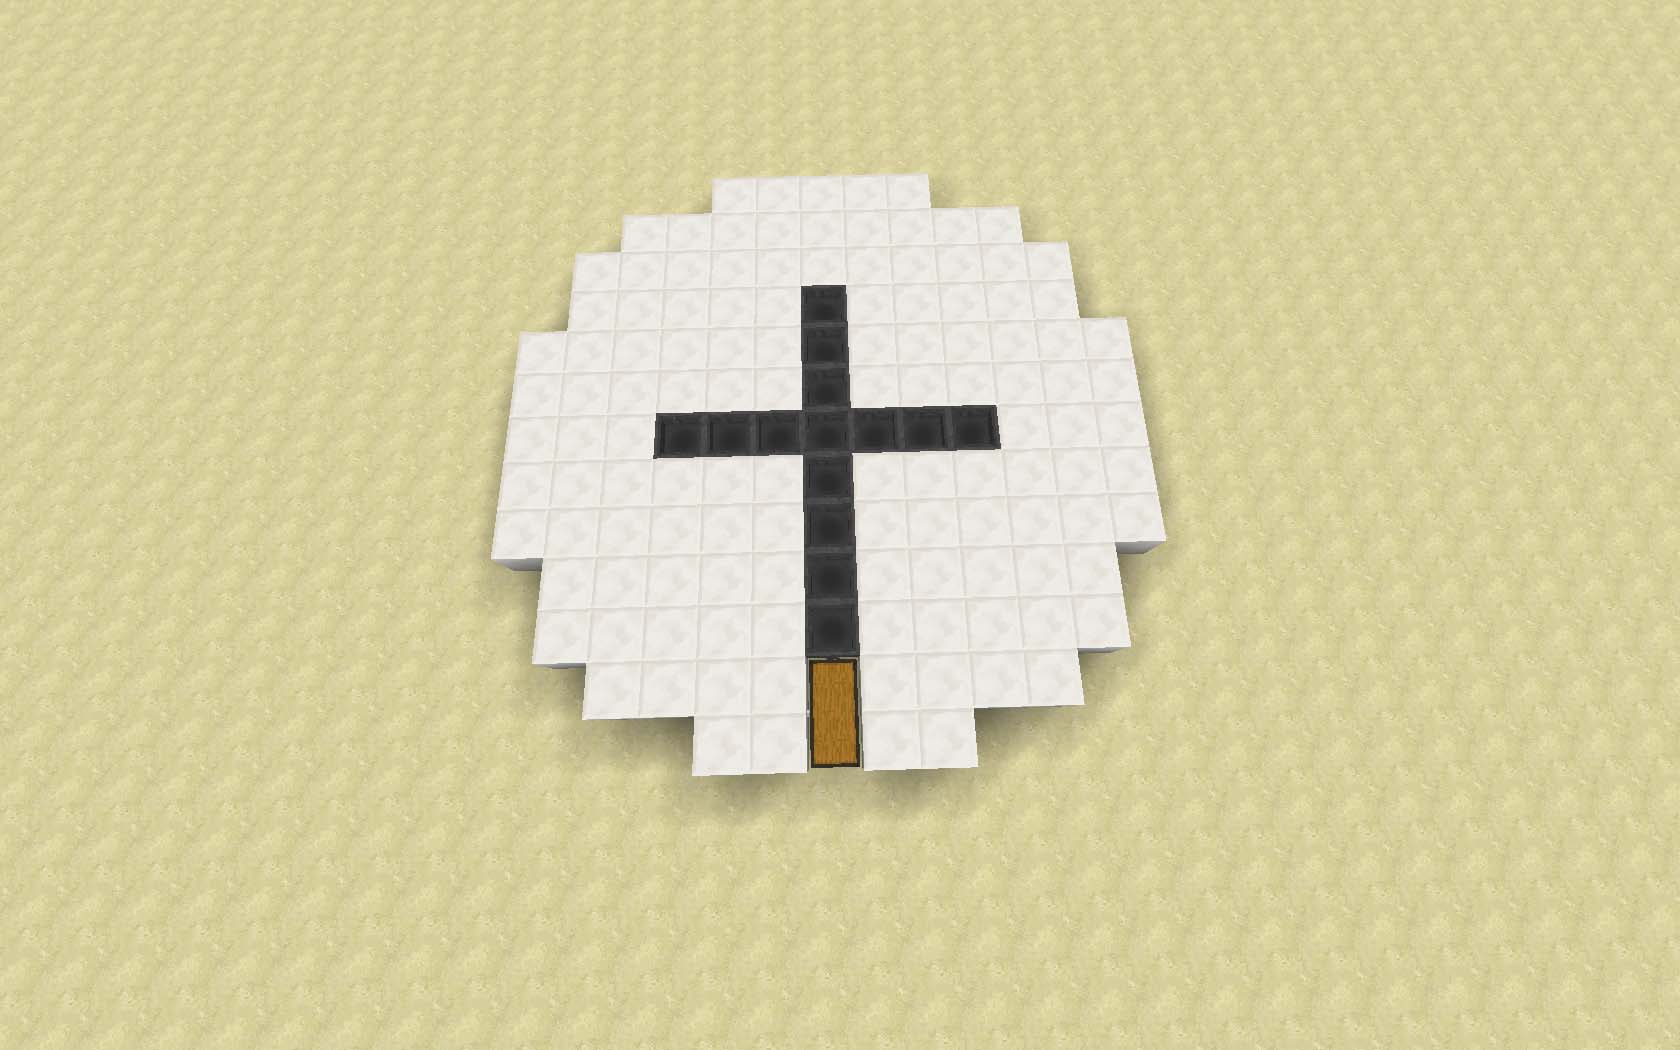
Make a circle with a diameter of 13, add a chest and guide hoppers into it like so.
Layer 2


Add blocks as shown (you can fill the gaps if you want), and add water flowing from the sides to the middle (two buckets per side for a total of eight)
NOTE: Above the hoppers are half slabs, and above the chest is an upside-down stair.
Layer 3

Add some dirt, and add a layer of your building block of choice for an inside and an outside ring, plus an inner ring of water.
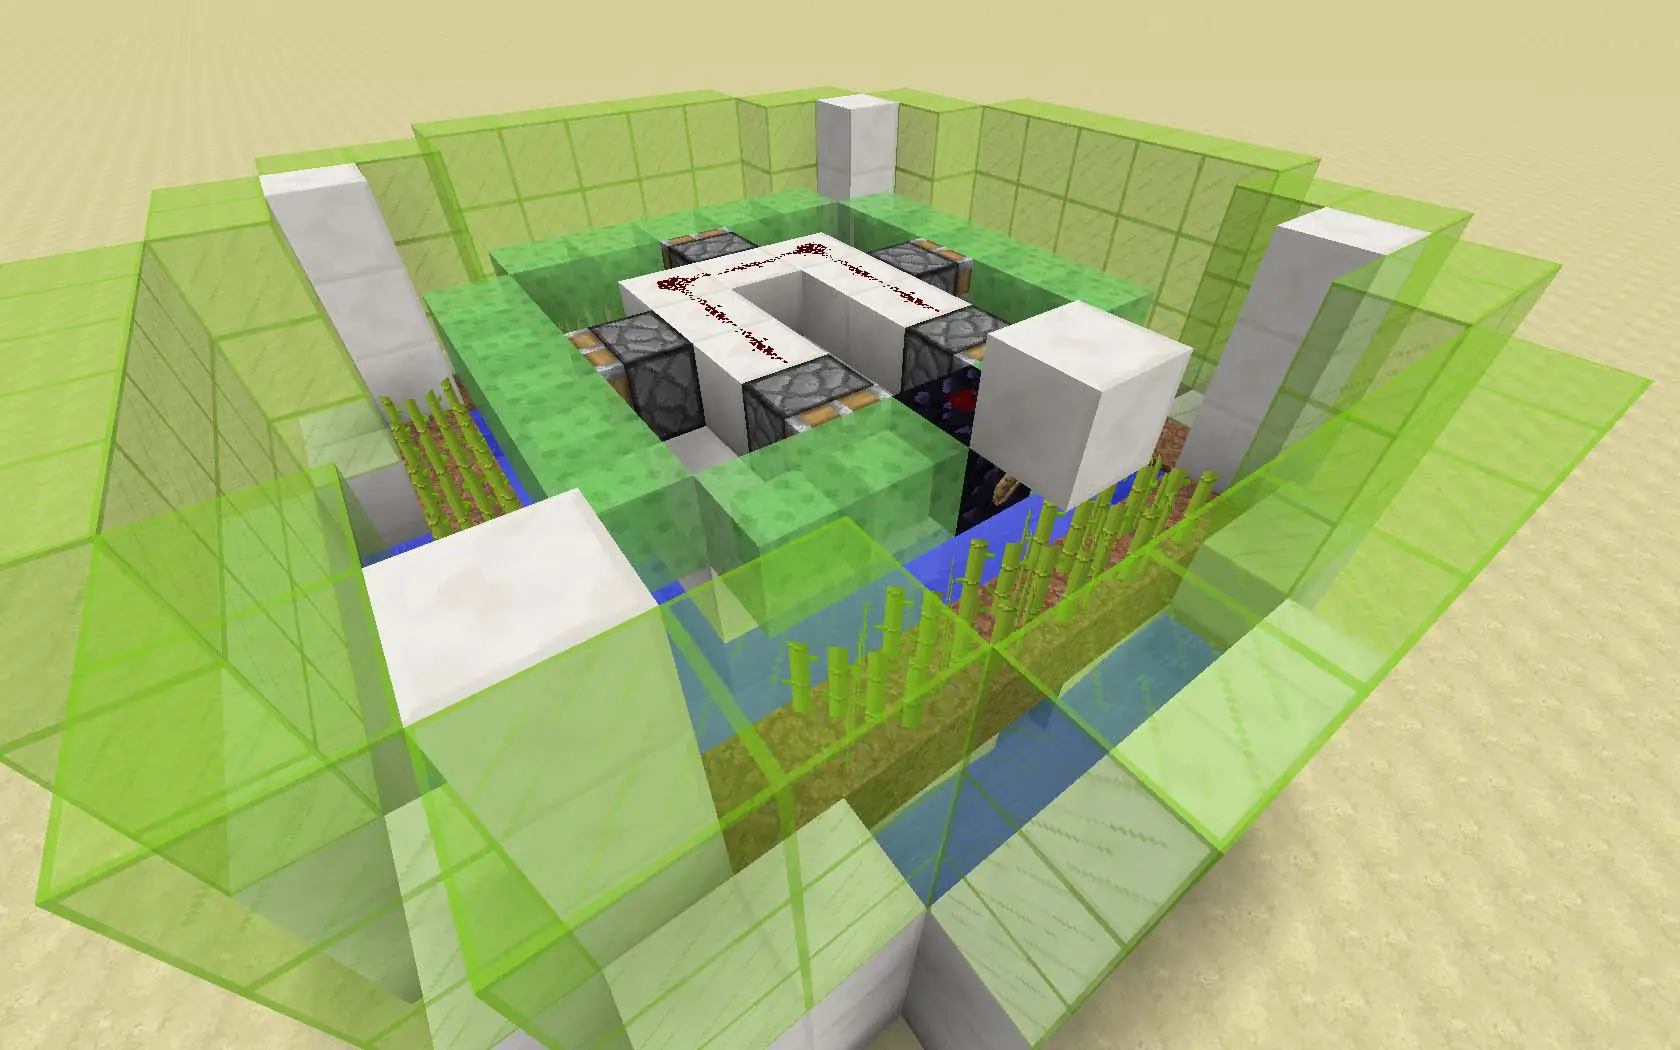
Layer 4
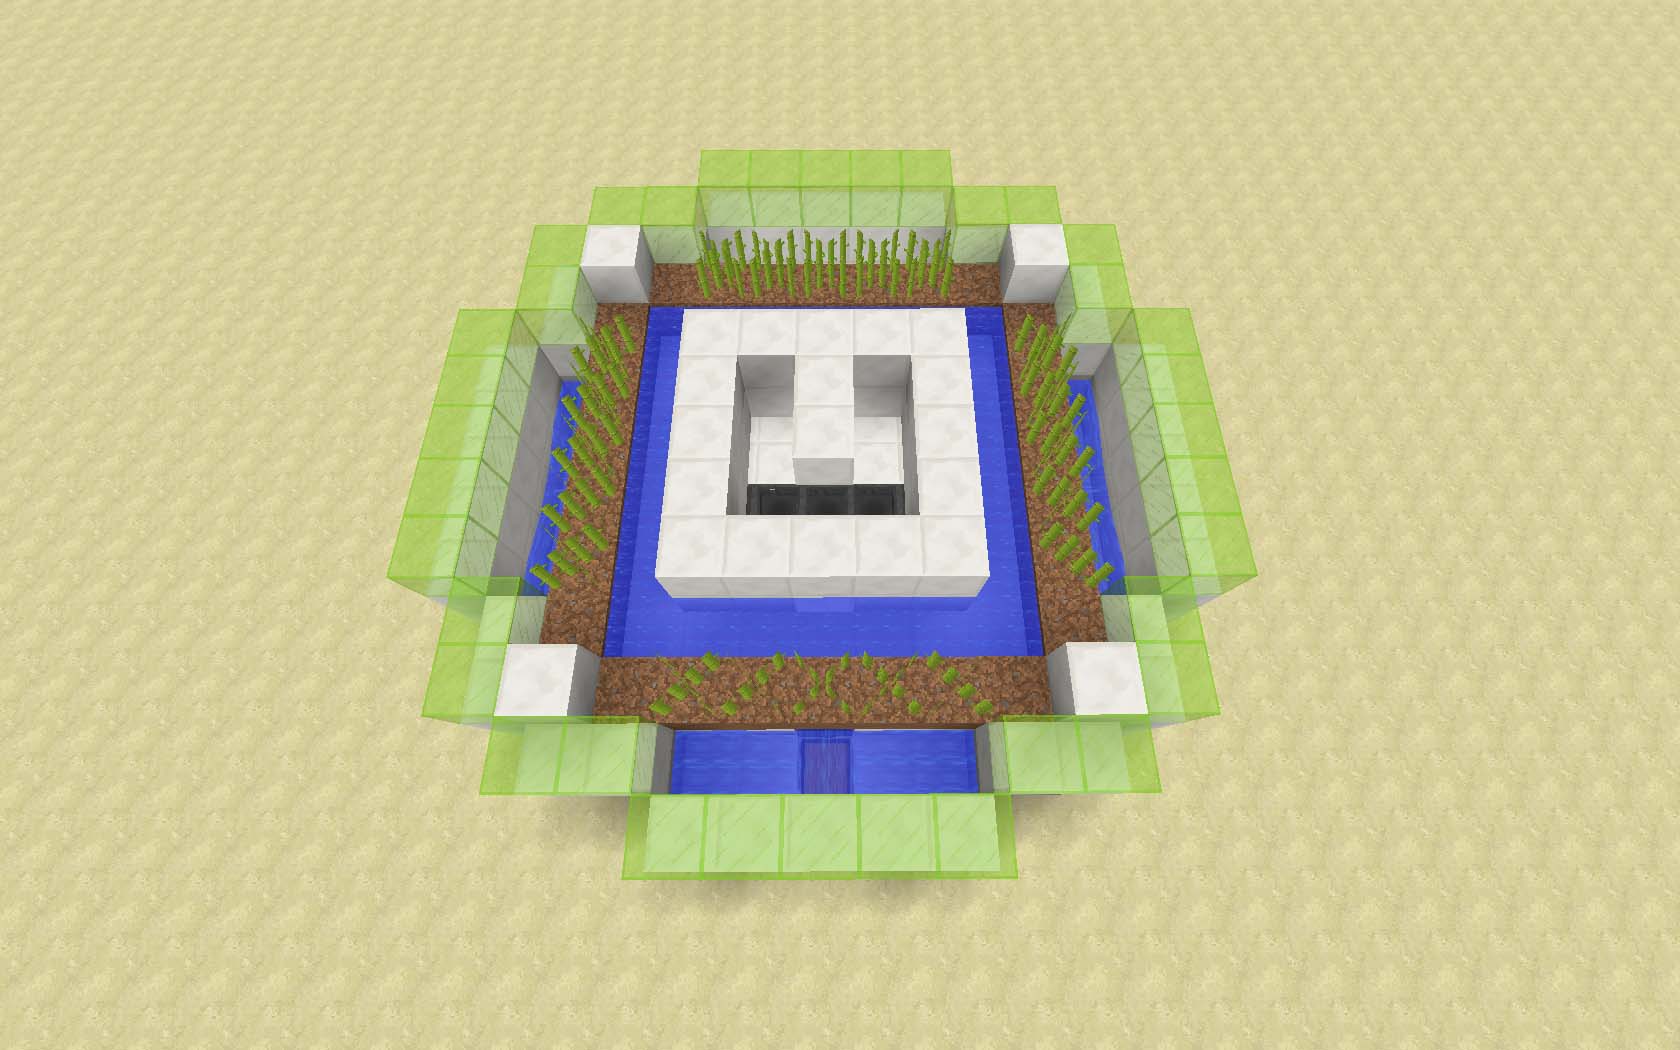
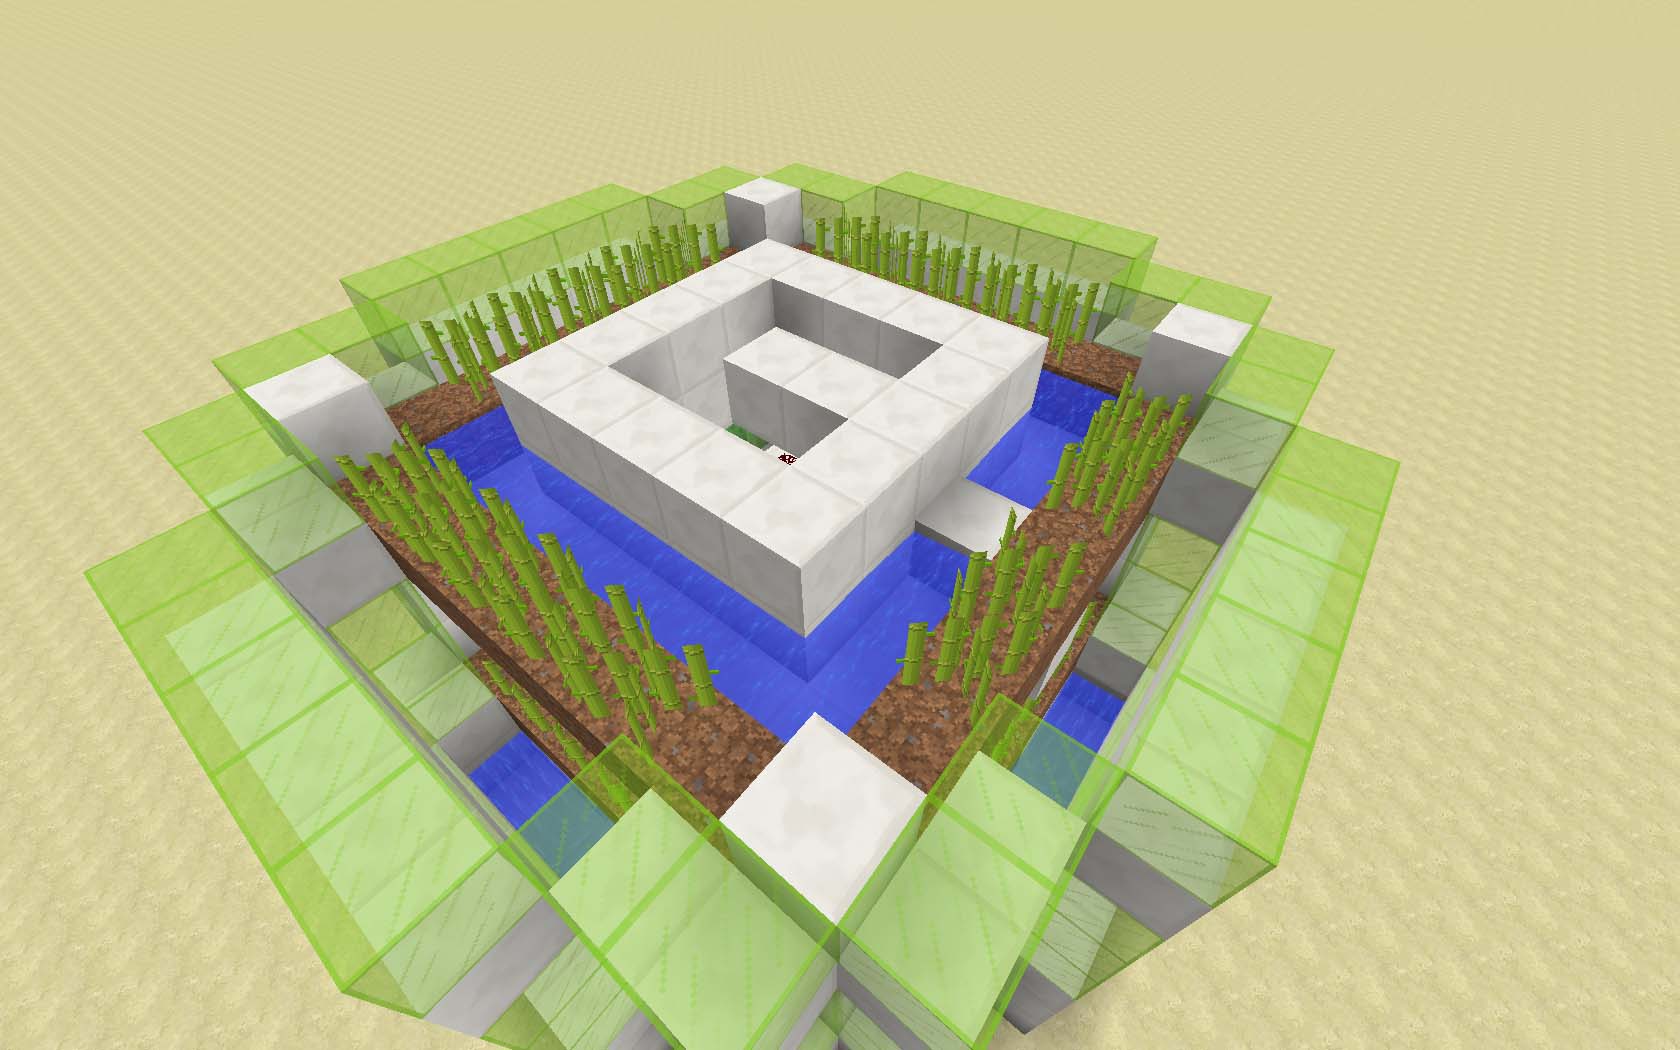
Next add glass outside, sugarcane and an inner ring with two blocks pointing to the front as shown.
NOTE: The outer most dirtblocks are not used for cane, they’re just a design choice
Layer 5
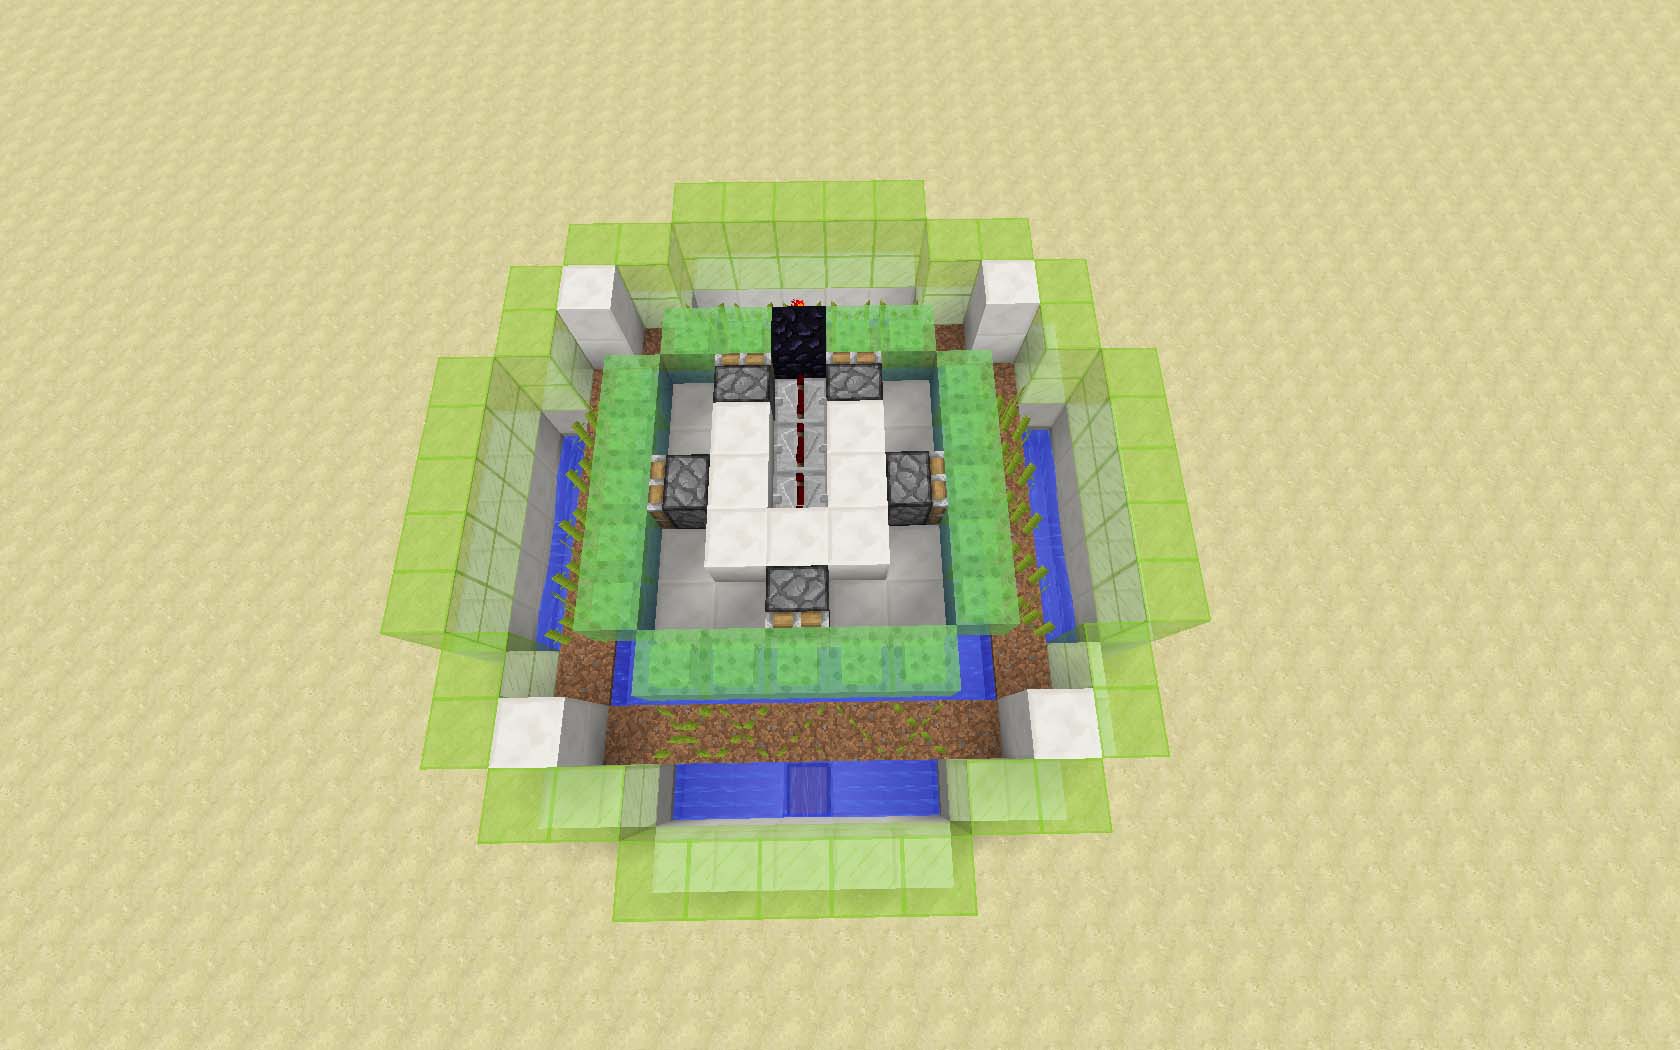
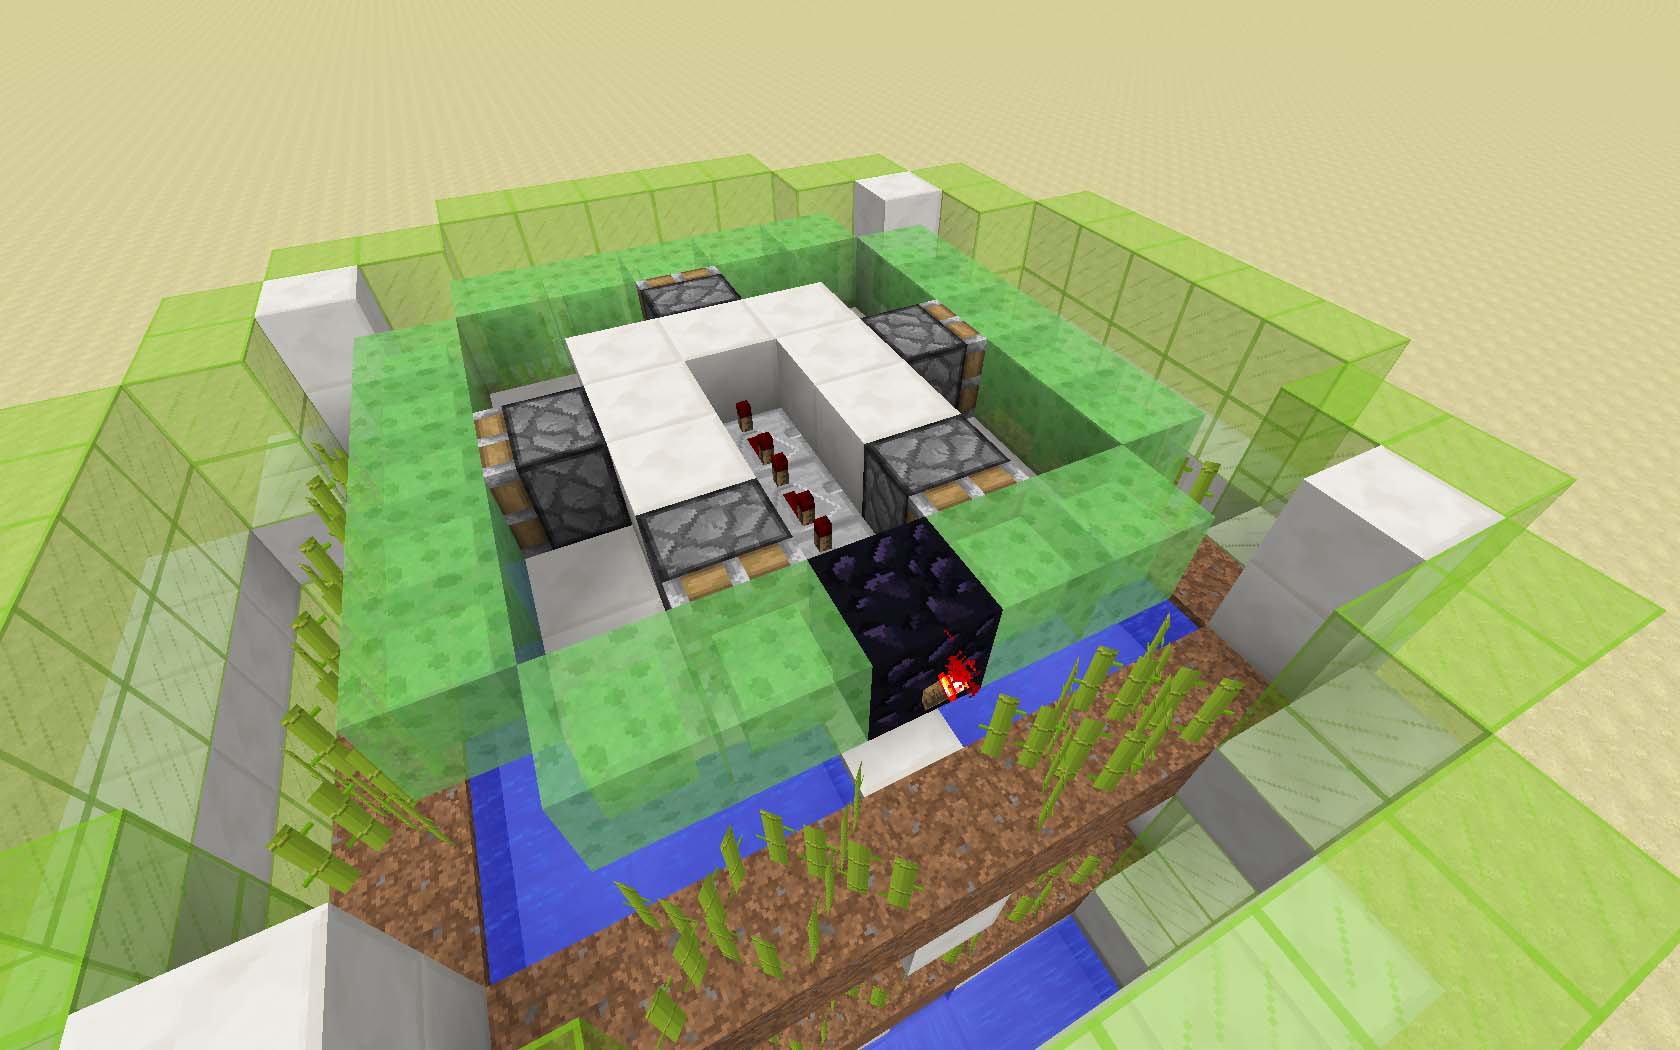
Now add pistons, slime blocks, obsidian, and three repeaters, all set to four ticks pointing AWAY from the obsidian block (or furnace or other immovable block) and put a redstone torch on the obsidian block. Also make a U-shape with your building block as shown.
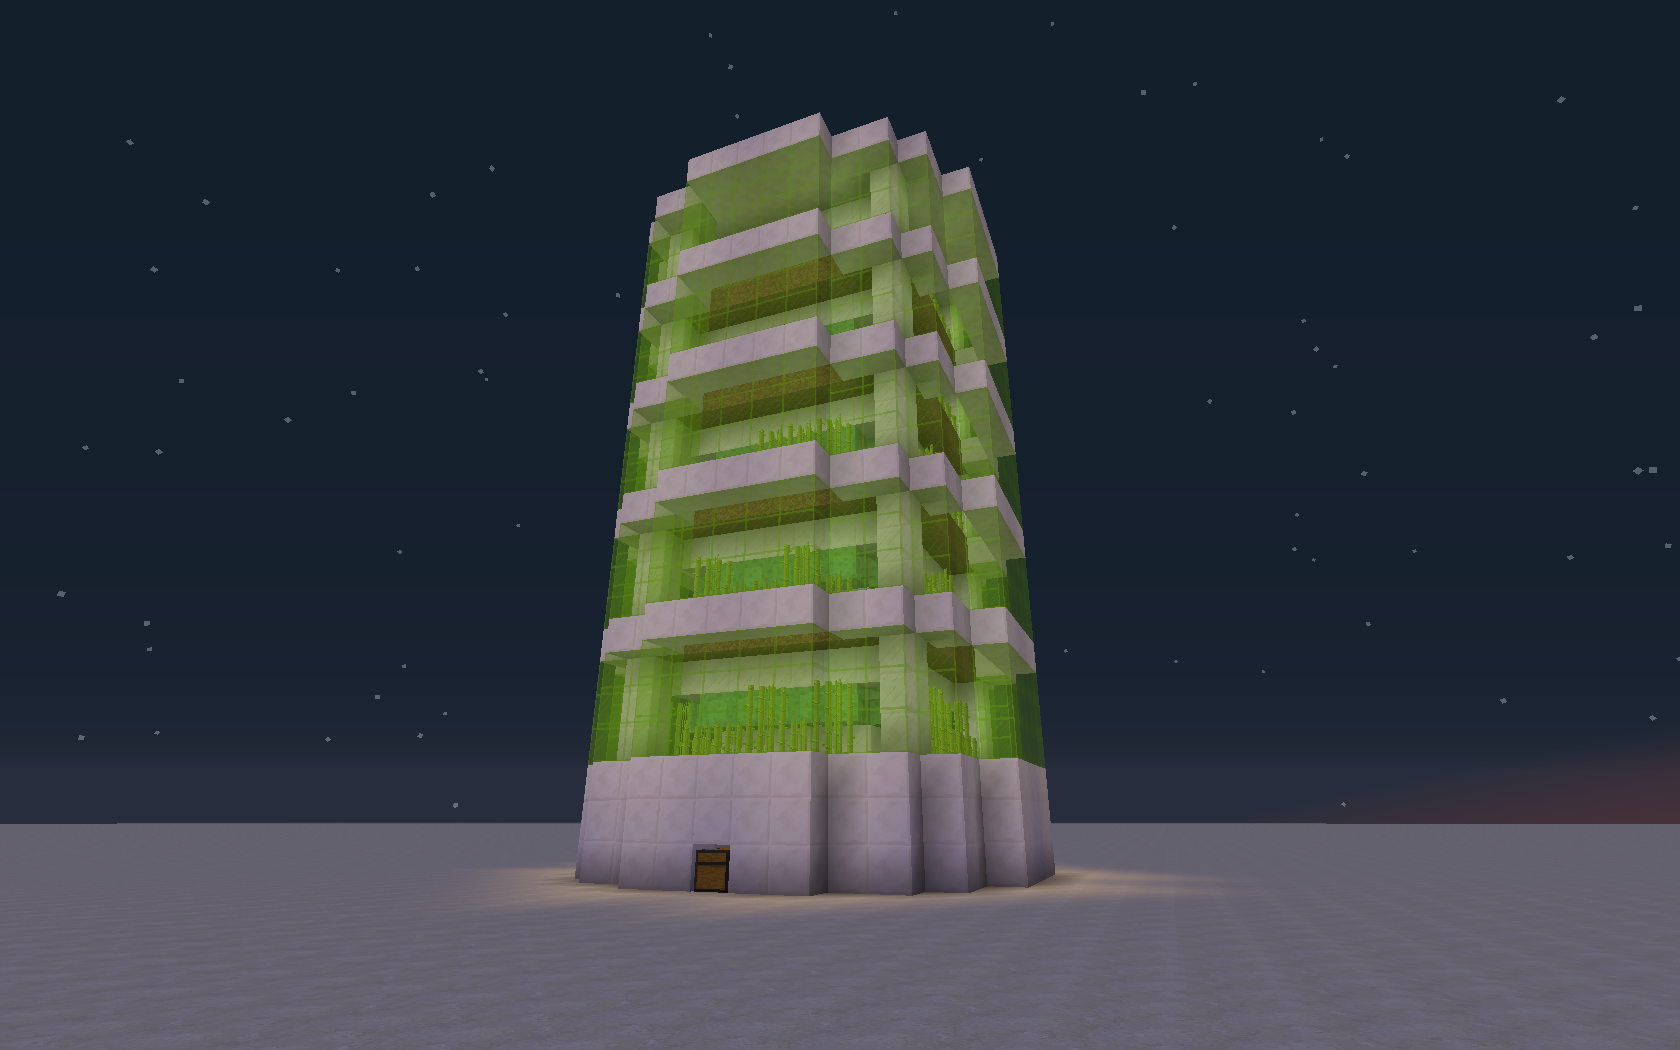
NOTE: You can add regular torches in the inner ring corners to get that night time glow effect.

Layer 6
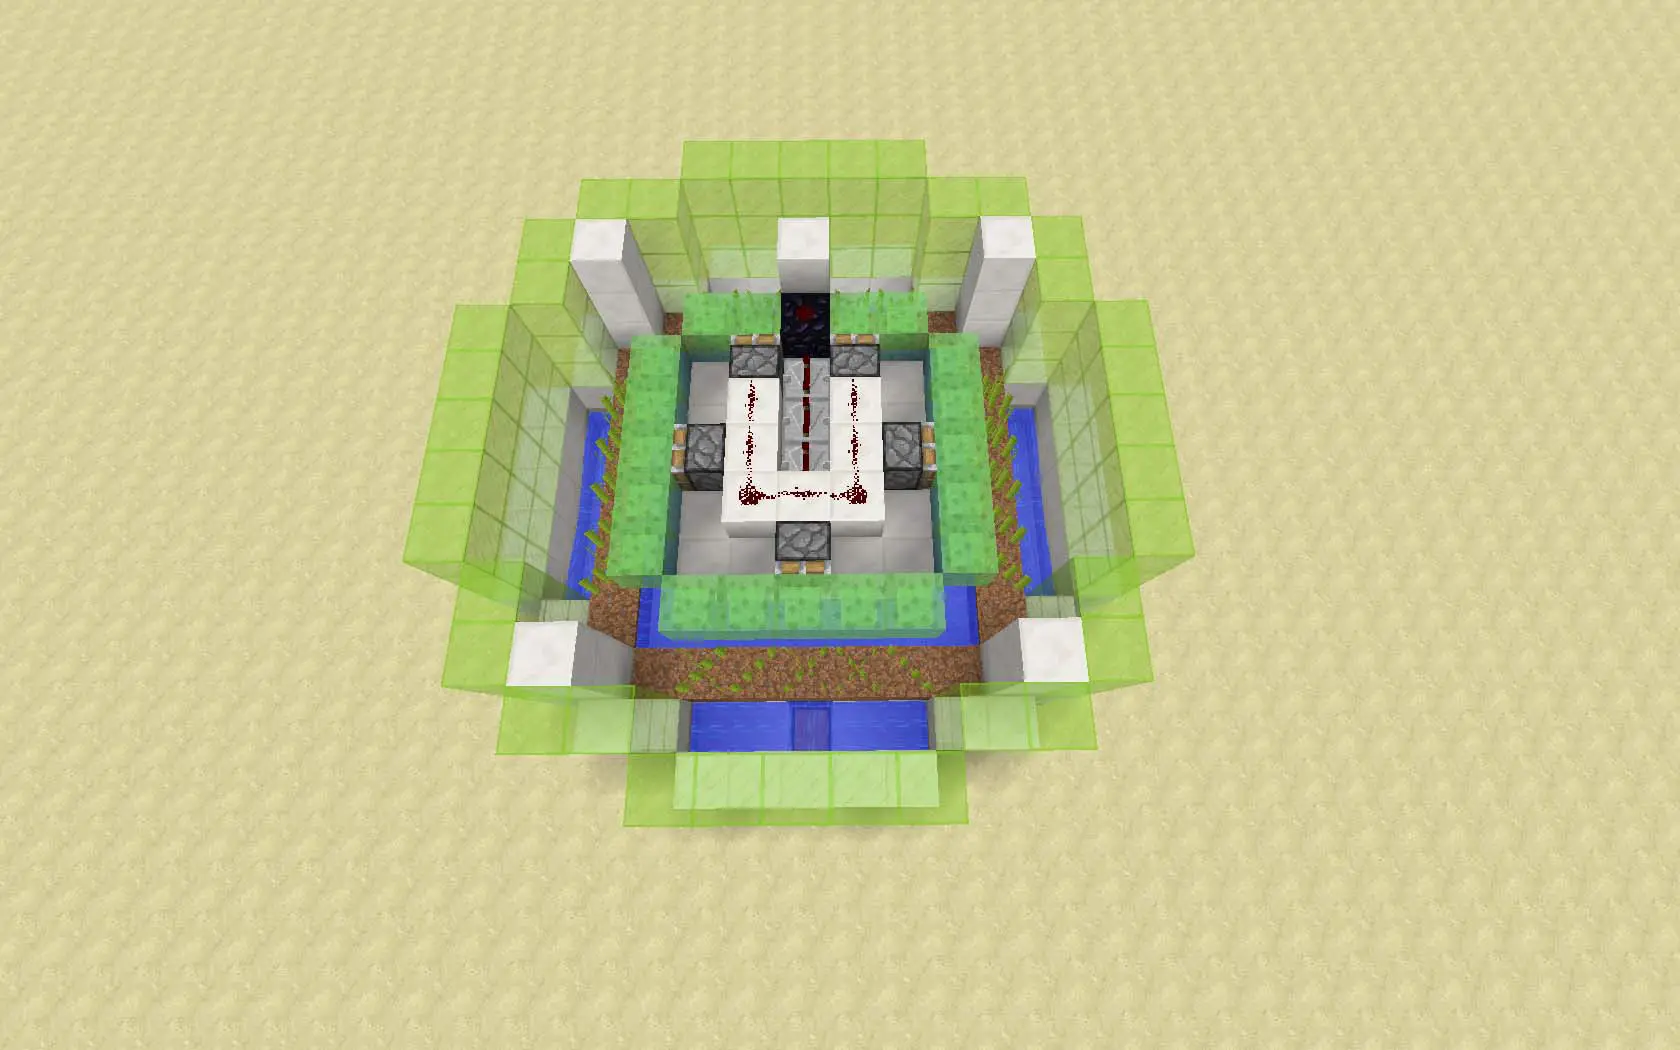
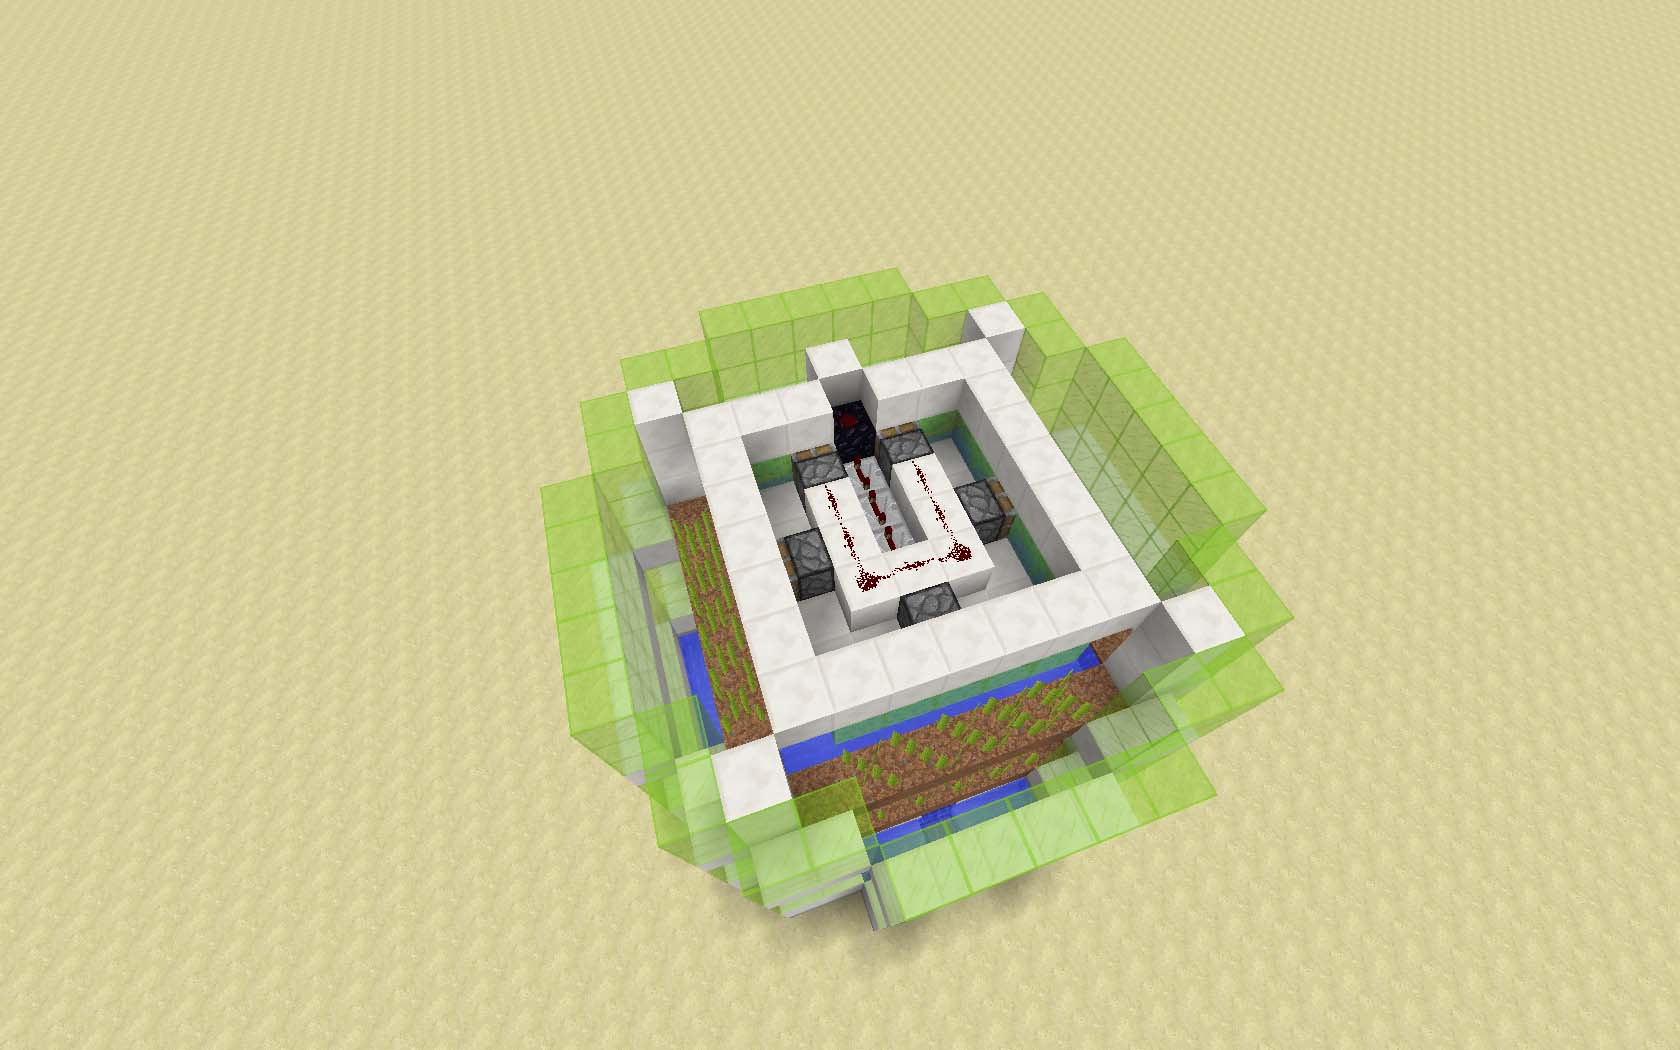
Redstone is next to be added to the sugar cane farm as you can see. The redstone on top of the obsidian with a block in front creates a short-circuit which conveniently now works as a really small BUD. The three repeaters stabilizes the short-circuit signal into a single pulse. That’s all for the first level and collection, you can add your roof here if you only want one level or you can continue with more levels to your sugar cane farm.
Finish the layer off with a square of building blocks right above the slime blocks, as shown beneath the water on the next picture.
Layer 7
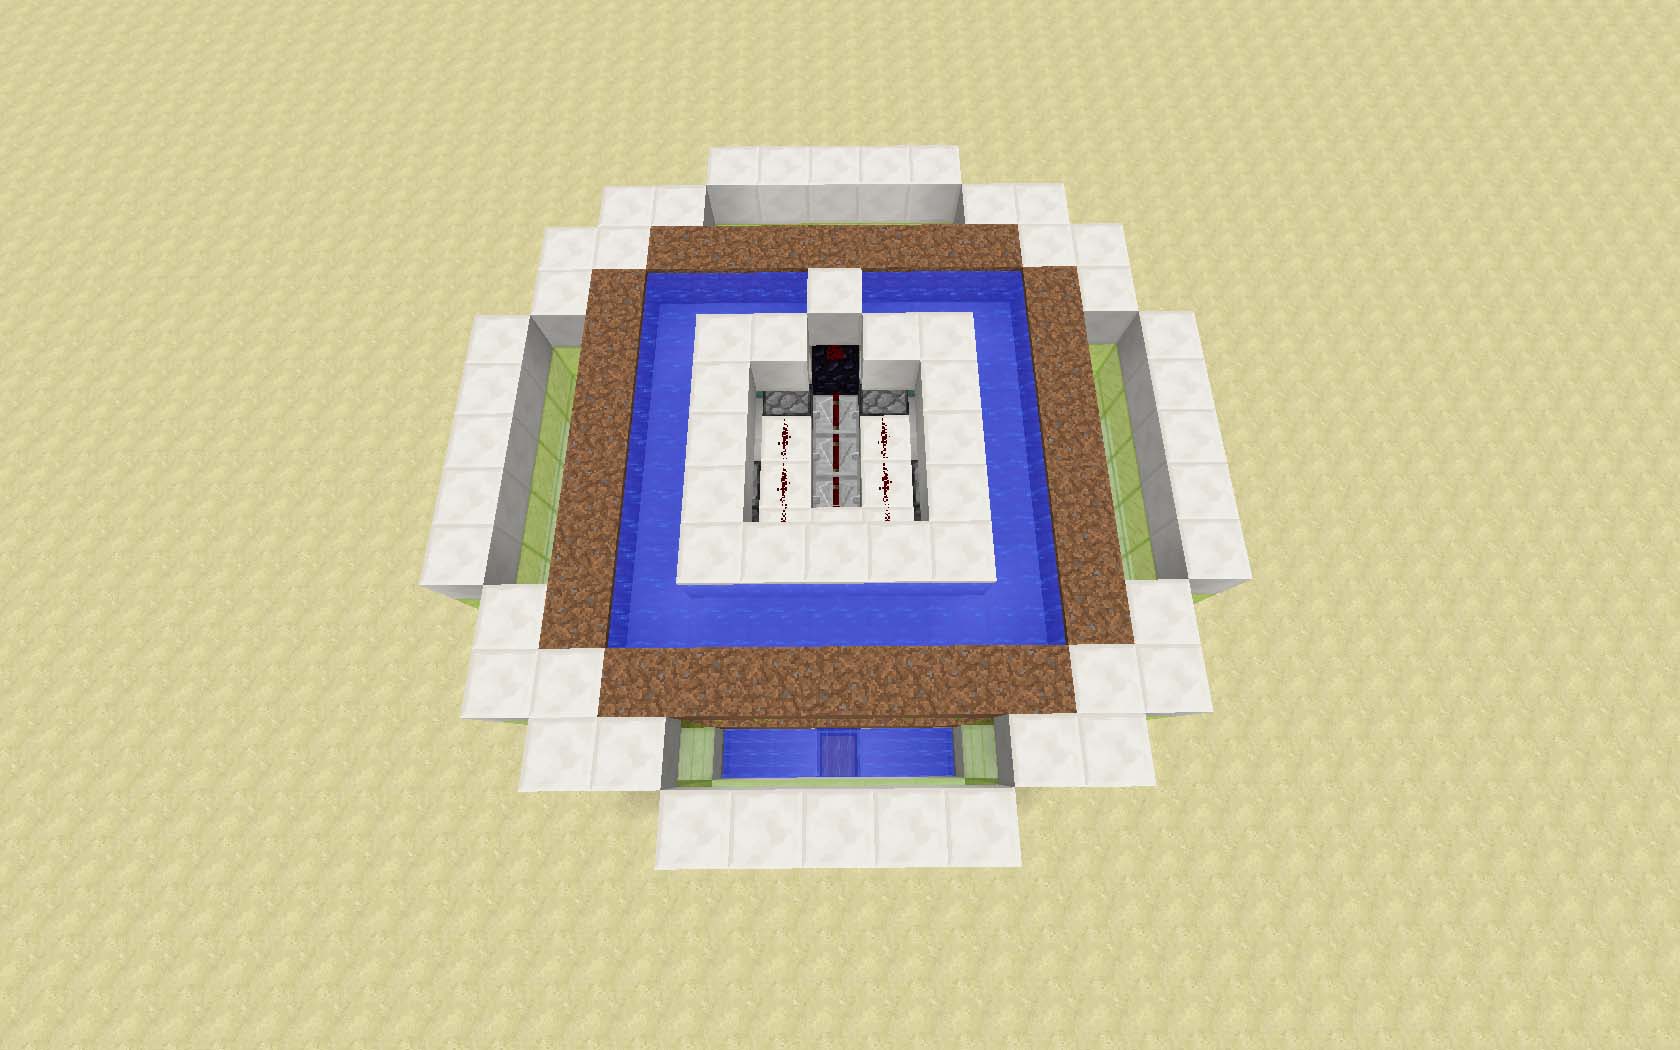
There’s just a small difference between the first level and the rest, and that’s a protective block above the redstone. Note the layer of quartz below the water.
Layer 8
From the other side, no real difference.
Layer 9
Layer 10
Don’t forget the regular torches in the inner ring to light your automatic sugar cane farm up.
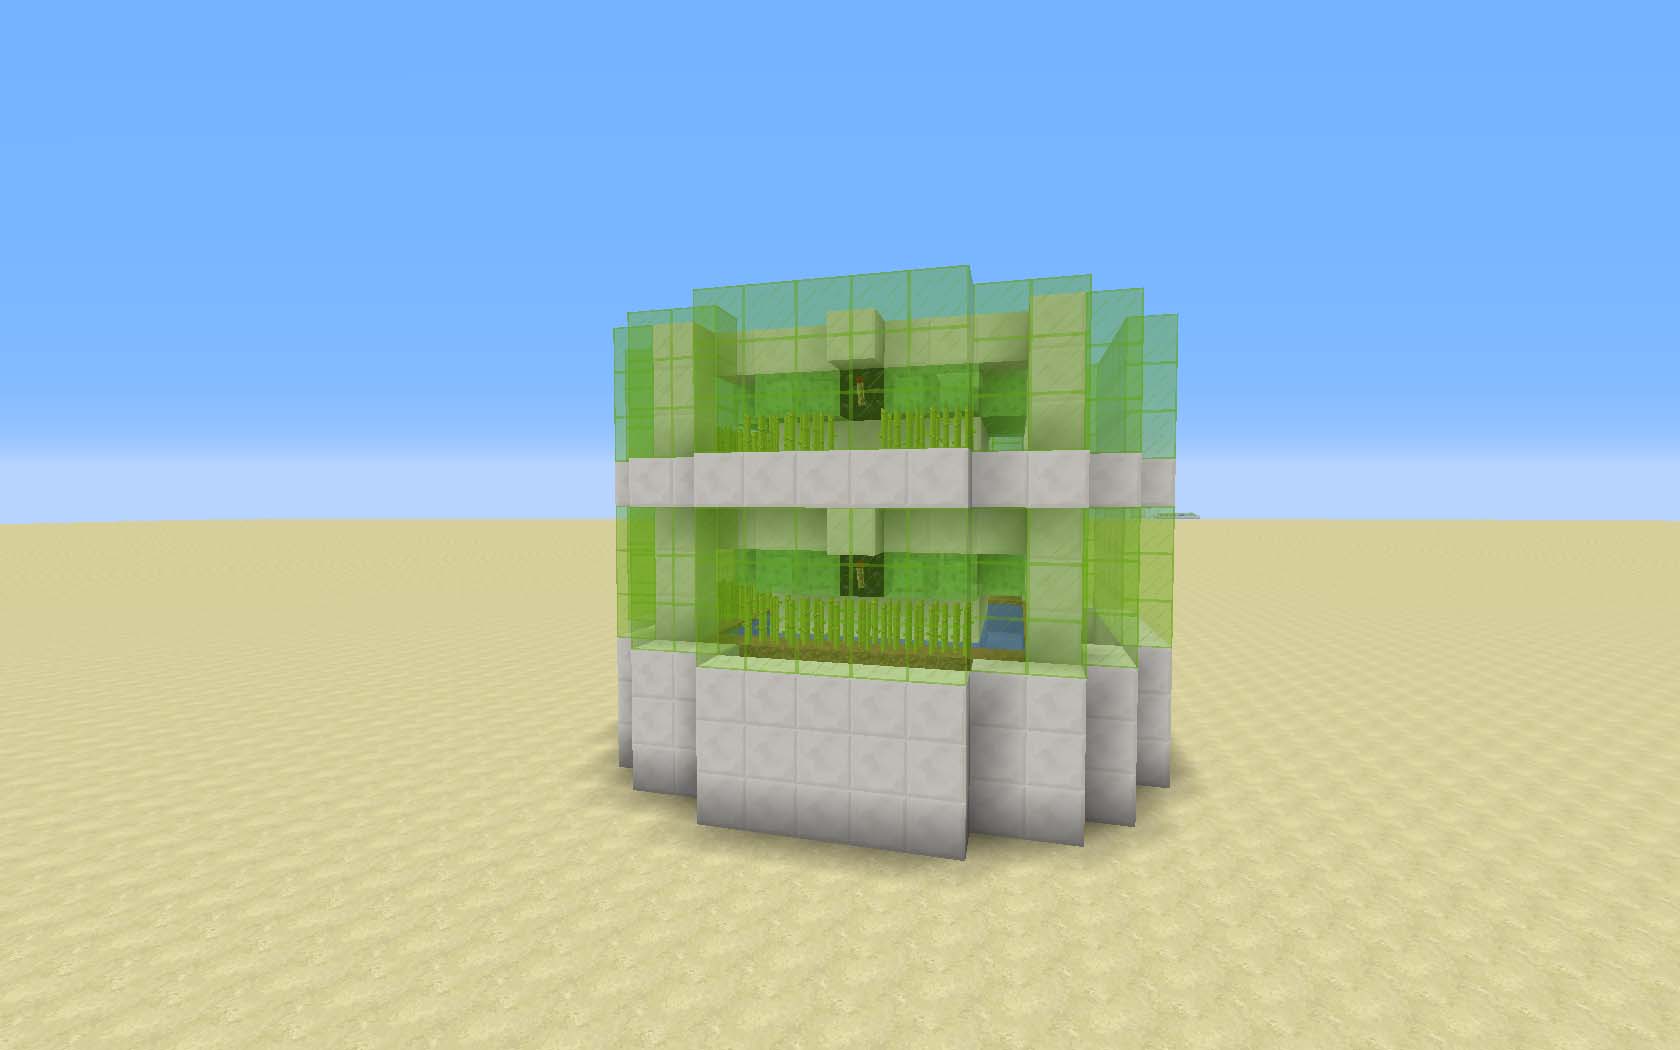
That’s two levels, let’s add some more!